
Once, on a peaceful summer evening, I was listening to my favorite Beatles album, “Abbey Road,” on my Crosley record player. In between the songs, I noticed distortion in the sound. As I belong to a family of people who collected vinyl records and turntables their whole lives, I knew it was time to replace needle on crosley record player.
Either it could be a scratched vinyl or the turntable needle. Upon examining both, it was confirmed that it was not the record that had the problem, but rather, it was my record player needle that had already passed its lifespan.
For anyone who is not aware, the Crosley stylus tip is either made of sapphire or diamond. While the sapphire needles last 40 to 50 hours, the diamond ones can last somewhere between 500 to 1000 hours. Both have their advantages; where sapphire-tipped needles are budget-friendly, diamond-tipped have more hours of lifespan and offer better sound.
If you have a budget Crosley turntable and have never replaced the stylus, there are higher chances it has a sapphire-tipped stylus. But you don’t have to worry about it because you can always upgrade to a diamond one.
And that’s why I am here: to help you replace your old, worn-out stylus with a new one. So what are you waiting for? Let’s get started!
Different Types of Needles Available
There are 8 needle types listed on the Crosley website that you can order for your turntable.
Below are the names of the needles, with the information about stylus-tip and headshell material, speed, dimensions, and total hours of lifespan.
| Needle Types | Stylus-tip Material | Headshell Material | Speed | Dimensions | Lifespan (Hours) |
|---|---|---|---|---|---|
| NS-1 | Sapphire | ABS plastic | 33 1/3, 45, and 78 RPM | 0.5”W x 0.12”D x 0.75”H | 40 to 50 |
| NP-5 | Diamond | ABS plastic | 33 1/3, 45, and 78 RPM | 0.5”W x 0.12”D x 0.75”H | 500 to 1000 |
| NP-6 | Sapphire | ABS plastic | 33 1/3, 45, and 78 RPM | 0.5”W x 0.12”D x 0.75”H | 40 to 50 |
| NP-7 | Diamond | ABS plastic | 33 1/3, 45, and 78 RPM | 0.5”W x 0.12”D x 0.75”H | 500 to 1000 |
| NP-10 | Sapphire | ABS plastic | 33 1/3, 45, and 78 RPM | 0.5”W x 0.12”D x 0.75”H | 40 to 50 |
| NP-14 | Diamond | ABS plastic | 33 1/3, 45, and 78 RPM | 0.5”W x 0.12”D x 0.75”H | 500 to 1000 |
| NP-15 | Diamond | ABS plastic | 33 1/3, 45, and 78 RPM | 0.5”W x 0.12”D x 0.75”H | 500 to 1000 |
| NP-16 | Sapphire | ABS plastic | 33 1/3, 45, and 78 RPM | 0.5”W x 0.12”D x 0.75”H | 40 to 50 |
Among these needle types, NP-6 and NP-5 are the most common ones.
- While NP-6 is compatible with the Cruiser Deluxe, Cruiser Plus, Voyager, Lancaster and Rhapsody.
- NP-5 is compatible with the Bermuda, Sterling, Portfolio, C62, the Gig and T150.
If you have a Crosley model not listed here, you can always check your turntable manual or ask Crosley support about the needle that suits your specific model.
Order replacement parts
Once you have figured out the right needle for your Crosley turntable, it’s time to purchase the replacement parts. You can order the replacement needle from the official Crosley website or buy one from a nearby electronic store.
If you are still clueless about which needle is suitable for your specific Crosley model, you can take your record player to your nearby electronic store and ask them for help.
Things required to proceed
Now that you have the replacement parts, here are some of the things you require before proceeding.
- Replacement needle: I know it’s obvious! But still, you need to keep it handy.
- Steady hand: Make sure you have steady hands before proceeding with the replacement.
- Flat-head screwdriver (optional): Just in case you don’t want to use your thumbnail.
You are all set to replace the needle on the Crosley record player
Finally, the moment has come. Let’s replace that old stylus with a new, shiny one.
Remove the old needle
Get your hands ready to remove the old needle by following these steps.
1. The first thing you need to do is unclip the tonearm from the safety latch.
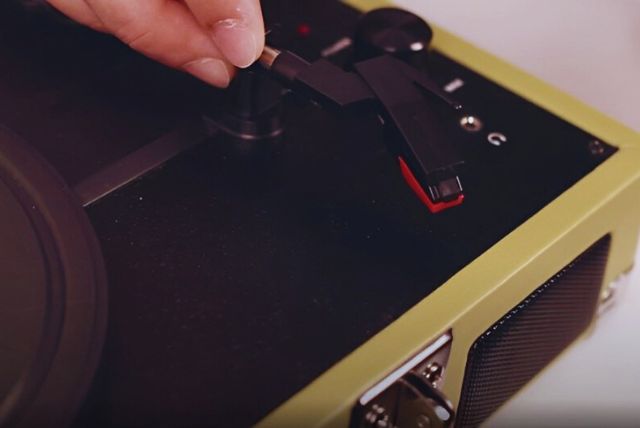
2. Now, hold the headshell with your non-dominant hand.
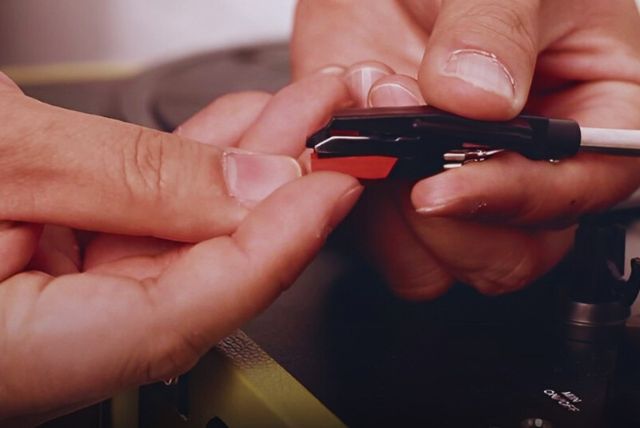
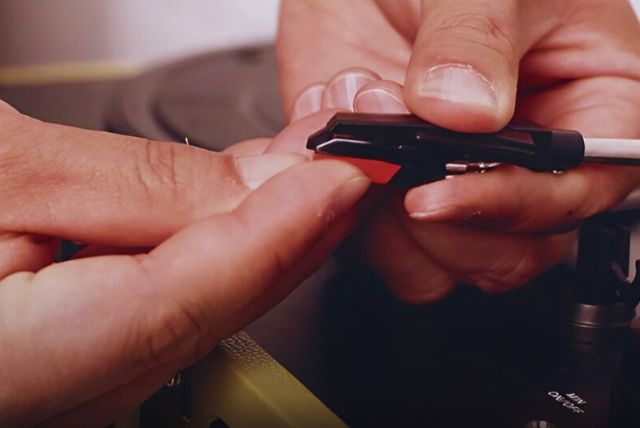
3. Now, gently push down the front of the needle with your thumbnail to separate the cartridge from the head. You can also use a screwdriver to perform the same.
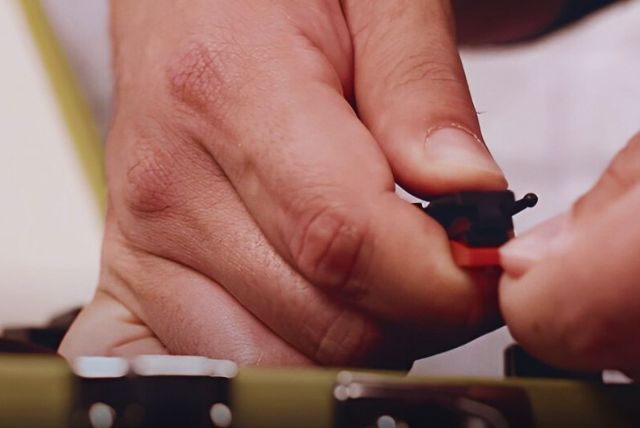
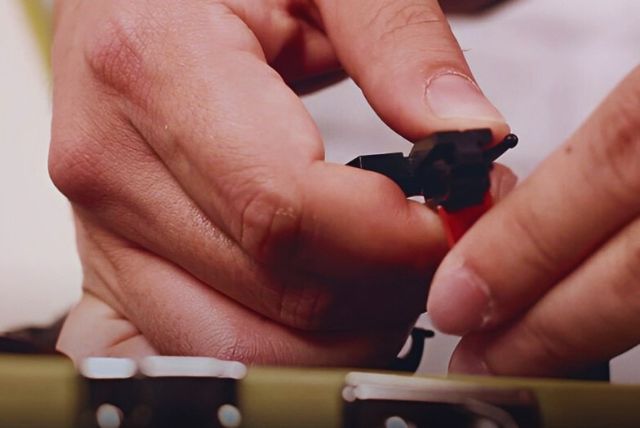
4. After that, pull the needle forward to remove the old cartridge.
Install the new cartridge
After successfully removing the old needle, it’s time to install the new one.
Here are the steps to do the same:
1. Pick the new cartridge with your dominant hand and position the stylus tip facing downwards.
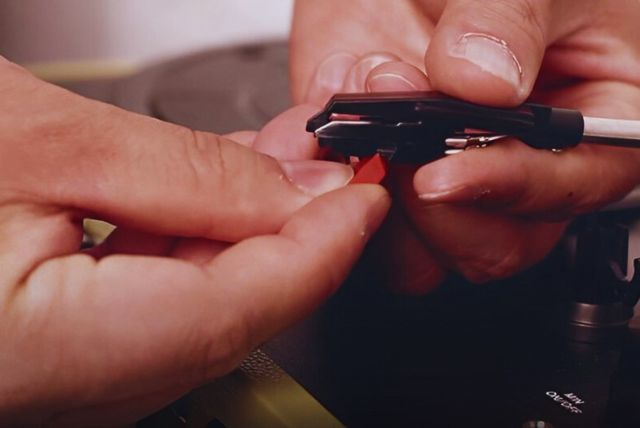
2. Now align the tab at the needle’s rear with the tonearm headshell.
3. Insert the needle with the tip facing downwards and slide the tab into the head.
4. Now gently raise the front of the needle and insert it into the tonearm headshell until it snaps securely.
5. After that, you will hear a clicking noise confirming the needle is locked.
6. Congrats, you have done it! Now you can enjoy your favorite record albums with the new can needle.
Final Beat
Remember, using a worn-out needle can damage your records by leaving scratches when playing them.
If you discover your Crosley turntable stylus is worn out, immediately order a replacement. Replacing it is easy if you have the replacement parts and follow the correct steps.
And if you still face any issues with the needle, don’t hesitate to leave a comment. I will be more than happy to help you!
Recommended:


To the turntabletrends.com admin, You always provide helpful information.
Thanks a lot, Olga. Comments like yours motivate me to provide more valuable information to my readers. 🙂